C#、WPF、バイリニア法での画像の拡大縮小変換、半透明画像(32bit画像)対応版
昨日の24bit対応版を改変
コード
縮小変換専用
//縮小専用
/// <summary>
/// 画像の縮小、バイリニア法で補完、PixelFormats.Bgra32専用)
/// </summary>
/// <param name="source">PixelFormats.Bgra32のBitmap</param>
/// <param name="yoko">変換後の横ピクセル数を指定</param>
/// <param name="tate">変換後の縦ピクセル数を指定</param>
/// <returns></returns>
private BitmapSource BilinearBgra32縮小専用(BitmapSource source, int yoko, int tate)
{
    //元画像の画素値の配列作成
    int sourceWidth = source.PixelWidth;
    int sourceHeight = source.PixelHeight;
    int stride = (sourceWidth * source.Format.BitsPerPixel + 7) / 8;
    byte[] pixels = new byte[sourceHeight * stride];
    source.CopyPixels(pixels, stride, 0);

    //変換後の画像の画素値の配列用
    double yokoScale = (double)sourceWidth / yoko;//横倍率
    double tateScale = (double)sourceHeight / tate;
    int scaledStride = (yoko * source.Format.BitsPerPixel + 7) / 8;
    byte[] resultPixels = new byte[tate * scaledStride];
    int pByte = (source.Format.BitsPerPixel + 7) / 8;//1ピクセルあたりのバイト数、Byte / Pixel

    _ = Parallel.For(0, tate, y =>
    {
        for (int x = 0; x < yoko; x++)
        {
            //参照範囲の左上座標bp
            double bpX = ((x + 0.5) * yokoScale) - 0.5;
            double bpY = ((y + 0.5) * tateScale) - 0.5;

            //小数部分s
            double sx = bpX % 1;
            double sy = bpY % 1;

            //面積
            double d = sx * sy;
            double c = (1 - sx) * sy;
            double b = sx * (1 - sy);
            double a = 1 - (d + c + b);// (1 - sx) * (1 - sy)

            //左上ピクセルの座標は
            //参照範囲の左上座標の小数部分を切り捨て(整数部分)
            //左上ピクセルのIndex
            int ia = ((int)bpY * stride) + ((int)bpX * pByte);
            int ib = ia + pByte;
            int ic = ((int)bpY * stride + stride) + ((int)bpX * pByte);
            int id = ((int)bpY * stride + stride) + ((int)bpX * pByte) + pByte;

            //Alphaが0の区画のRGB値は無視したいので初期値1.0から面積を引き算して
            //有効面積率を計算
            byte aAlpha = pixels[ia + 3];
            byte bAlpha = pixels[ia + pByte + 3];
            byte cAlpha = pixels[ia + stride + 3];
            byte dAlpha = pixels[ia + stride + pByte + 3];
            //有効面積率
            double effectiveAreaRatio = 1.0;
            if (aAlpha == 0) effectiveAreaRatio -= a;
            if (bAlpha == 0) effectiveAreaRatio -= b;
            if (cAlpha == 0) effectiveAreaRatio -= c;
            if (dAlpha == 0) effectiveAreaRatio -= d;
            //1.0/有効面積率、これをRGB合計値に掛け算
            effectiveAreaRatio = 1.0 / effectiveAreaRatio;

            //各区の値*面積の合計に有効面積倍率を掛け算してから四捨五入して完成
            //Blue
            resultPixels[y * scaledStride + x * pByte] =
                  (byte)(((
                  pixels[ia] * a
                  + pixels[ia + pByte] * b
                  + pixels[ia + stride] * c
                  + pixels[ia + stride + pByte] * d
                  ) * effectiveAreaRatio
                  ) + 0.5);
            //Green
            resultPixels[y * scaledStride + x * pByte + 1] =
                  (byte)(((pixels[ia + 1] * a
                  + pixels[ia + pByte + 1] * b
                  + pixels[ia + stride + 1] * c
                  + pixels[ia + stride + pByte + 1] * d) * effectiveAreaRatio)
                  + 0.5);
            //Red
            resultPixels[y * scaledStride + x * pByte + 2] =
                  (byte)(((pixels[ia + 2] * a
                  + pixels[ia + pByte + 2] * b
                  + pixels[ia + stride + 2] * c
                  + pixels[ia + stride + pByte + 2] * d) * effectiveAreaRatio)
                  + 0.5);
            //Alpha
            resultPixels[y * scaledStride + x * pByte + 3] =
            (byte)((aAlpha * a) + (bAlpha * b) + (cAlpha * c) + (dAlpha * d) + 0.5);
        }
    });


    BitmapSource bitmap = BitmapSource.Create(yoko, tate, 96, 96, source.Format, null, resultPixels, scaledStride);
    return bitmap;
}
拡大縮小両対応
/// <summary>
/// 画像の拡大縮小、バイリニア法で補完(PixelFormats.Bgra32専用)
/// </summary>
/// <param name="source">PixelFormats.Bgra32のBitmap</param>
/// <param name="yoko">横ピクセル数を指定</param>
/// <param name="tate">縦ピクセル数を指定</param>
/// <returns></returns>
private BitmapSource BilinearBgra32専用(BitmapSource source, int yoko, int tate)
{
    //元画像の画素値の配列作成
    int sourceWidth = source.PixelWidth;
    int sourceHeight = source.PixelHeight;
    int stride = (sourceWidth * source.Format.BitsPerPixel + 7) / 8;
    byte[] pixels = new byte[sourceHeight * stride];
    source.CopyPixels(pixels, stride, 0);

    //縮小後の画像の画素値の配列用
    double yokoScale = (double)sourceWidth / yoko;//横倍率
    double tateScale = (double)sourceHeight / tate;
    //1ピクセルあたりのバイト数、Byte / Pixel
    int pByte = (source.Format.BitsPerPixel + 7) / 8;

    int scaledStride = yoko * pByte;
    byte[] resultPixels = new byte[tate * scaledStride];
    Parallel.For(0, tate, y =>
    {
        for (int x = 0; x < yoko; x++)
        {
            //参照範囲の左上座標bp
            double bpX = ((x + 0.5) * yokoScale) - 0.5;
            //画像範囲内チェック、参照範囲が画像から外れていたら修正(収める)
            if (bpX < 0) { bpX = 0; }
            if (bpX > sourceWidth - 1) { bpX = sourceWidth - 1; }

            double bpY = (y + 0.5) * tateScale - 0.5;
            if (bpY < 0) { bpY = 0; }
            if (bpY > sourceHeight - 1) { bpY = sourceHeight - 1; }

            //小数部分s
            double sx = bpX % 1;
            double sy = bpY % 1;

            //面積
            double d = sx * sy;
            double c = (1 - sx) * sy;
            double b = sx * (1 - sy);
            double a = 1 - (d + c + b);// (1 - sx) * (1 - sy)

            //左上ピクセルの座標は
            //参照範囲の左上座標の小数部分を切り捨て(整数部分)
            //左上ピクセルのIndex
            int i = ((int)bpY * stride) + ((int)bpX * pByte);


            //値*面積
            double aBlue = pixels[i] * a;
            double aGreen = pixels[i + 1] * a;
            double aRed = pixels[i + 2] * a;
            double aAlpha = pixels[i + 3] * a;

            //Alphaが0の区画のRGB値は無視したいので初期値1.0から面積を引き算して
            //有効面積率を計算
            double effectiveAreaRatio = 1.0;
            if (pixels[i + 3] == 0) effectiveAreaRatio -= a;

            double bB = 0;
            double bG = 0;
            double bR = 0;
            double bA = 0;

            double cB = 0;
            double cG = 0;
            double cR = 0;
            double cA = 0;

            double dB = 0;
            double dG = 0;
            double dR = 0;
            double dA = 0;

            int pp;
            //B区以降は面積が0より大きいときだけ計算
            if (b != 0)
            {
                //Aの右ピクセル*Bの面積
                pp = i + pByte;
                bB = pixels[pp] * b;
                bG = pixels[pp + 1] * b;
                bR = pixels[pp + 2] * b;
                bA = pixels[pp + 3] * b;
                if (pixels[pp + 3] == 0) effectiveAreaRatio -= b;
            }
            if (c != 0)
            {
                //下側ピクセル
                pp = i + stride;
                cB = pixels[pp] * c;
                cG = pixels[pp + 1] * c;
                cR = pixels[pp + 2] * c;
                cA = pixels[pp + 3] * c;
                if (pixels[pp + 3] == 0) effectiveAreaRatio -= c;
            }
            if (d != 0)
            {
                //Aの右下ピクセル、仮にAが画像右下ピクセルだったとしても
                //そのときは面積が0のはずだからここは計算されない
                pp = i + stride + pByte;
                dB = pixels[pp] * d;
                dG = pixels[pp + 1] * d;
                dR = pixels[pp + 2] * d;
                dA = pixels[pp + 3] * d;
                if (pixels[pp + 3] == 0) effectiveAreaRatio -= d;
            }

            //Alpha0の面積によって倍率変更
            //有効面積率はRGBそれぞれに掛け算
            effectiveAreaRatio = 1 / effectiveAreaRatio;

            //4区を合計して四捨五入で完成
            resultPixels[(y * scaledStride) + (x * pByte)] = (byte)(((aBlue + bB + cB + dB) * effectiveAreaRatio) + 0.5);
            resultPixels[(y * scaledStride) + (x * pByte) + 1] = (byte)(((aGreen + bG + cG + dG) * effectiveAreaRatio) + 0.5);
            resultPixels[(y * scaledStride) + (x * pByte) + 2] = (byte)(((aRed + bR + cR + dR) * effectiveAreaRatio) + 0.5);
            resultPixels[(y * scaledStride) + (x * pByte) + 3] = (byte)(aAlpha + bA + cA + dA + 0.5);
        }
    });

    BitmapSource bitmap = BitmapSource.Create(yoko, tate, 96, 96, source.Format, null, resultPixels, scaledStride);
    return bitmap;
}
テストアプリ

作成動作環境
- Windows 10 Home バージョン 2004
- Visual Studio Community 2019
- WPF
- C#
- .NET 5
MainWindow.xaml
<Window x:Class="_20210417_Bilinearで画像拡大縮小32bitカラー.MainWindow"
        xmlns="http://schemas.microsoft.com/winfx/2006/xaml/presentation"
        xmlns:x="http://schemas.microsoft.com/winfx/2006/xaml"
        xmlns:d="http://schemas.microsoft.com/expression/blend/2008"
        xmlns:mc="http://schemas.openxmlformats.org/markup-compatibility/2006"
        xmlns:local="clr-namespace:_20210417_Bilinearで画像拡大縮小32bitカラー"
        mc:Ignorable="d"
        Title="MainWindow" Height="450" Width="614"
        AllowDrop="True" Drop="Window_Drop">
  <Grid>
    <DockPanel UseLayoutRounding="True">
      <StackPanel DockPanel.Dock="Right">
        <Button x:Name="MyButton1" Content="1/2倍" Click="MyButton1_Click"/>
        <Button x:Name="MyButton2" Content="1/3倍" Click="MyButton2_Click"/>
        <Button x:Name="MyButton3" Content="2倍" Click="MyButton3_Click"/>
        <Button x:Name="MyButton4" Content="3倍" Click="MyButton4_Click"/>
        <Button x:Name="MyButton5" Content="1/5倍" Click="MyButton5_Click"/>
        <Button x:Name="MyButtonCopy" Content="コピー" Click="MyButtonCopy_Click" Margin="10"/>
        <Button x:Name="MyButtonPaste" Content="ペースト" Click="MyButtonPaste_Click" Margin="10"/>
      </StackPanel>
      <ScrollViewer HorizontalScrollBarVisibility="Auto" VerticalScrollBarVisibility="Auto">
        <Image x:Name="MyImage" Stretch="None"/>
      </ScrollViewer>
    </DockPanel>
  </Grid>
</Window>
MainWindow.xaml.cs
using System; using System.Linq; using System.Threading.Tasks; using System.Windows; using System.Windows.Media; using System.Windows.Media.Imaging; namespace _20210417_Bilinearで画像拡大縮小32bitカラー { public partial class MainWindow : Window { private BitmapSource MyBitmapOrigin; public MainWindow() { InitializeComponent(); #if DEBUG this.Top = 0; this.Left = 0; #endif this.Background = MakeTileBrush(MakeCheckeredPattern(10, Colors.WhiteSmoke, Colors.LightGray)); } //縮小拡大対応完成版 /// <summary> /// 画像の拡大縮小、バイリニア法で補完(PixelFormats.Bgra32専用) /// </summary> /// <param name="source">PixelFormats.Bgra32のBitmap</param> /// <param name="yoko">横ピクセル数を指定</param> /// <param name="tate">縦ピクセル数を指定</param> /// <returns></returns> private BitmapSource BilinearBgra32専用(BitmapSource source, int yoko, int tate) { //元画像の画素値の配列作成 int sourceWidth = source.PixelWidth; int sourceHeight = source.PixelHeight; int stride = (sourceWidth * source.Format.BitsPerPixel + 7) / 8; byte[] pixels = new byte[sourceHeight * stride]; source.CopyPixels(pixels, stride, 0); //縮小後の画像の画素値の配列用 double yokoScale = (double)sourceWidth / yoko;//横倍率 double tateScale = (double)sourceHeight / tate; //1ピクセルあたりのバイト数、Byte / Pixel int pByte = (source.Format.BitsPerPixel + 7) / 8; int scaledStride = yoko * pByte; byte[] resultPixels = new byte[tate * scaledStride]; Parallel.For(0, tate, y => { for (int x = 0; x < yoko; x++) { //参照範囲の左上座標bp double bpX = ((x + 0.5) * yokoScale) - 0.5; //画像範囲内チェック、参照範囲が画像から外れていたら修正(収める) if (bpX < 0) { bpX = 0; } if (bpX > sourceWidth - 1) { bpX = sourceWidth - 1; } double bpY = (y + 0.5) * tateScale - 0.5; if (bpY < 0) { bpY = 0; } if (bpY > sourceHeight - 1) { bpY = sourceHeight - 1; } //小数部分s double sx = bpX % 1; double sy = bpY % 1; //面積 double d = sx * sy; double c = (1 - sx) * sy; double b = sx * (1 - sy); double a = 1 - (d + c + b);// (1 - sx) * (1 - sy) //左上ピクセルの座標は //参照範囲の左上座標の小数部分を切り捨て(整数部分) //左上ピクセルのIndex int i = ((int)bpY * stride) + ((int)bpX * pByte); //値*面積 double aBlue = pixels[i] * a; double aGreen = pixels[i + 1] * a; double aRed = pixels[i + 2] * a; double aAlpha = pixels[i + 3] * a; //Alphaが0の区画のRGB値は無視したいので初期値1.0から面積を引き算して //有効面積率を計算 double effectiveAreaRatio = 1.0; if (pixels[i + 3] == 0) effectiveAreaRatio -= a; double bB = 0; double bG = 0; double bR = 0; double bA = 0; double cB = 0; double cG = 0; double cR = 0; double cA = 0; double dB = 0; double dG = 0; double dR = 0; double dA = 0; int pp; //B区以降は面積が0より大きいときだけ計算 if (b != 0) { //Aの右ピクセル*Bの面積 pp = i + pByte; bB = pixels[pp] * b; bG = pixels[pp + 1] * b; bR = pixels[pp + 2] * b; bA = pixels[pp + 3] * b; if (pixels[pp + 3] == 0) effectiveAreaRatio -= b; } if (c != 0) { //下側ピクセル pp = i + stride; cB = pixels[pp] * c; cG = pixels[pp + 1] * c; cR = pixels[pp + 2] * c; cA = pixels[pp + 3] * c; if (pixels[pp + 3] == 0) effectiveAreaRatio -= c; } if (d != 0) { //Aの右下ピクセル、仮にAが画像右下ピクセルだったとしても //そのときは面積が0のはずだからここは計算されない pp = i + stride + pByte; dB = pixels[pp] * d; dG = pixels[pp + 1] * d; dR = pixels[pp + 2] * d; dA = pixels[pp + 3] * d; if (pixels[pp + 3] == 0) effectiveAreaRatio -= d; } //Alpha0の面積によって倍率変更 //有効面積率はRGBそれぞれに掛け算 effectiveAreaRatio = 1 / effectiveAreaRatio; //4区を合計して四捨五入で完成 resultPixels[(y * scaledStride) + (x * pByte)] = (byte)(((aBlue + bB + cB + dB) * effectiveAreaRatio) + 0.5); resultPixels[(y * scaledStride) + (x * pByte) + 1] = (byte)(((aGreen + bG + cG + dG) * effectiveAreaRatio) + 0.5); resultPixels[(y * scaledStride) + (x * pByte) + 2] = (byte)(((aRed + bR + cR + dR) * effectiveAreaRatio) + 0.5); resultPixels[(y * scaledStride) + (x * pByte) + 3] = (byte)(aAlpha + bA + cA + dA + 0.5); } }); BitmapSource bitmap = BitmapSource.Create(yoko, tate, 96, 96, source.Format, null, resultPixels, scaledStride); return bitmap; } //E:\オレ\エクセル\画像処理.xlsm_バイリニア法_$A$599 //縮小専用 /// <summary> /// 画像の縮小、バイリニア法で補完、PixelFormats.Bgra32専用) /// </summary> /// <param name="source">PixelFormats.Bgra32のBitmap</param> /// <param name="yoko">変換後の横ピクセル数を指定</param> /// <param name="tate">変換後の縦ピクセル数を指定</param> /// <returns></returns> private BitmapSource BilinearBgra32縮小専用(BitmapSource source, int yoko, int tate) { //元画像の画素値の配列作成 int sourceWidth = source.PixelWidth; int sourceHeight = source.PixelHeight; int stride = (sourceWidth * source.Format.BitsPerPixel + 7) / 8; byte[] pixels = new byte[sourceHeight * stride]; source.CopyPixels(pixels, stride, 0); //変換後の画像の画素値の配列用 double yokoScale = (double)sourceWidth / yoko;//横倍率 double tateScale = (double)sourceHeight / tate; int scaledStride = (yoko * source.Format.BitsPerPixel + 7) / 8; byte[] resultPixels = new byte[tate * scaledStride]; int pByte = (source.Format.BitsPerPixel + 7) / 8;//1ピクセルあたりのバイト数、Byte / Pixel _ = Parallel.For(0, tate, y => { for (int x = 0; x < yoko; x++) { //参照範囲の左上座標bp double bpX = ((x + 0.5) * yokoScale) - 0.5; double bpY = ((y + 0.5) * tateScale) - 0.5; //小数部分s double sx = bpX % 1; double sy = bpY % 1; //面積 double d = sx * sy; double c = (1 - sx) * sy; double b = sx * (1 - sy); double a = 1 - (d + c + b);// (1 - sx) * (1 - sy) //左上ピクセルの座標は //参照範囲の左上座標の小数部分を切り捨て(整数部分) //左上ピクセルのIndex int ia = ((int)bpY * stride) + ((int)bpX * pByte); int ib = ia + pByte; int ic = ((int)bpY * stride + stride) + ((int)bpX * pByte); int id = ((int)bpY * stride + stride) + ((int)bpX * pByte) + pByte; //Alphaが0の区画のRGB値は無視したいので初期値1.0から面積を引き算して //有効面積率を計算 byte aAlpha = pixels[ia + 3]; byte bAlpha = pixels[ia + pByte + 3]; byte cAlpha = pixels[ia + stride + 3]; byte dAlpha = pixels[ia + stride + pByte + 3]; //有効面積率 double effectiveAreaRatio = 1.0; if (aAlpha == 0) effectiveAreaRatio -= a; if (bAlpha == 0) effectiveAreaRatio -= b; if (cAlpha == 0) effectiveAreaRatio -= c; if (dAlpha == 0) effectiveAreaRatio -= d; //1.0/有効面積率、これをRGB合計値に掛け算 effectiveAreaRatio = 1.0 / effectiveAreaRatio; //各区の値*面積の合計に有効面積倍率を掛け算してから四捨五入して完成 //Blue resultPixels[y * scaledStride + x * pByte] = (byte)((( pixels[ia] * a + pixels[ia + pByte] * b + pixels[ia + stride] * c + pixels[ia + stride + pByte] * d ) * effectiveAreaRatio ) + 0.5); //Green resultPixels[y * scaledStride + x * pByte + 1] = (byte)(((pixels[ia + 1] * a + pixels[ia + pByte + 1] * b + pixels[ia + stride + 1] * c + pixels[ia + stride + pByte + 1] * d) * effectiveAreaRatio) + 0.5); //Red resultPixels[y * scaledStride + x * pByte + 2] = (byte)(((pixels[ia + 2] * a + pixels[ia + pByte + 2] * b + pixels[ia + stride + 2] * c + pixels[ia + stride + pByte + 2] * d) * effectiveAreaRatio) + 0.5); //Alpha resultPixels[y * scaledStride + x * pByte + 3] = (byte)((aAlpha * a) + (bAlpha * b) + (cAlpha * c) + (dAlpha * d) + 0.5); } }); BitmapSource bitmap = BitmapSource.Create(yoko, tate, 96, 96, source.Format, null, resultPixels, scaledStride); return bitmap; } /// <summary> /// 画像ファイルパスからPixelFormats.Bgra32のBitmapSource作成 /// </summary> /// <param name="filePath"></param> /// <param name="dpiX"></param> /// <param name="dpiY"></param> /// <returns></returns> private BitmapSource MakeBitmapSourceGray8FromFile(string filePath, double dpiX = 96, double dpiY = 96) { BitmapSource source = null; try { using (var stream = System.IO.File.OpenRead(filePath)) { source = BitmapFrame.Create(stream); if (source.Format != PixelFormats.Bgra32) { source = new FormatConvertedBitmap(source, PixelFormats.Bgra32, null, 0); } int w = source.PixelWidth; int h = source.PixelHeight; int stride = (w * source.Format.BitsPerPixel + 7) / 8; byte[] pixels = new byte[h * stride]; source.CopyPixels(pixels, stride, 0); source = BitmapSource.Create(w, h, dpiX, dpiY, source.Format, source.Palette, pixels, stride); }; } catch (Exception) { } return source; } // クリップボードに複数の形式のデータをコピーする - .NET Tips(VB.NET, C#...) //https://dobon.net/vb/dotnet/system/clipboardmultidata.html // アルファ値を失わずに画像のコピペできた、.NET WPFのClipboard - 午後わてんのブログ //https://gogowaten.hatenablog.com/entry/2021/02/10/134406 /// <summary> /// BitmapSourceをPNG形式に変換したものと、そのままの形式の両方をクリップボードにコピーする /// </summary> /// <param name="source"></param> private void ClipboardSetImageWithPng(BitmapSource source) { //DataObjectに入れたいデータを入れて、それをクリップボードにセットする DataObject data = new(); //BitmapSource形式そのままでセット data.SetData(typeof(BitmapSource), source); //PNG形式にエンコードしたものをMemoryStreamして、それをセット //画像をPNGにエンコード PngBitmapEncoder pngEnc = new(); pngEnc.Frames.Add(BitmapFrame.Create(source)); //エンコードした画像をMemoryStreamにSava using var ms = new System.IO.MemoryStream(); pngEnc.Save(ms); data.SetData("PNG", ms); //クリップボードにセット Clipboard.SetDataObject(data, true); } /// <summary> /// クリップボードからBitmapSourceを取り出して返す、PNG(アルファ値保持)形式に対応 /// </summary> /// <returns></returns> private BitmapSource GetImageFromClipboardWithPNG() { BitmapSource source = null; //クリップボードにPNG形式のデータがあったら、それを使ってBitmapFrame作成して返す //なければ普通にClipboardのGetImage、それでもなければnullを返す using var ms = (System.IO.MemoryStream)Clipboard.GetData("PNG"); if (ms != null) { //source = BitmapFrame.Create(ms);//これだと取得できない source = BitmapFrame.Create(ms, BitmapCreateOptions.None, BitmapCacheOption.OnLoad); } else if (Clipboard.ContainsImage()) { source = Clipboard.GetImage(); } return source; } /// <summary> /// 市松模様の元になる画像作成、2色を2マスずつ合計4マス交互に並べた画像、 /// □■ /// ■□ /// </summary> /// <param name="cellSize">1マスの1辺の長さ、作成される画像はこれの2倍の1辺になる</param> /// <param name="c1">色1</param> /// <param name="c2">色2</param> /// <returns>画像のピクセルフォーマットはBgra32</returns> private WriteableBitmap MakeCheckeredPattern(int cellSize, Color c1, Color c2) { int width = cellSize * 2; int height = cellSize * 2; var wb = new WriteableBitmap(width, height, 96, 96, PixelFormats.Bgra32, null); int stride = 4 * width;// wb.Format.BitsPerPixel / 8 * width; byte[] pixels = new byte[stride * height]; //すべてを1色目で塗る for (int i = 0; i < pixels.Length; i += 4) { pixels[i] = c1.B; pixels[i + 1] = c1.G; pixels[i + 2] = c1.R; pixels[i + 3] = c1.A; } //2色目で市松模様にする for (int y = 0; y < height; y++) { for (int x = 0; x < width; x++) { //左上と右下に塗る if ((y < cellSize & x < cellSize) | (y >= cellSize & x >= cellSize)) { int p = y * stride + x * 4; pixels[p] = c2.B; pixels[p + 1] = c2.G; pixels[p + 2] = c2.R; pixels[p + 3] = c2.A; } } } wb.WritePixels(new Int32Rect(0, 0, width, height), pixels, stride, 0); return wb; } /// <summary> /// BitmapからImageBrush作成 /// 引き伸ばし無しでタイル状に敷き詰め /// </summary> /// <param name="bitmap"></param> /// <returns></returns> private ImageBrush MakeTileBrush(BitmapSource bitmap) { var imgBrush = new ImageBrush(bitmap); imgBrush.Stretch = Stretch.None;//これは必要ないかも //タイルモード、タイル imgBrush.TileMode = TileMode.Tile; //タイルサイズは元画像のサイズ imgBrush.Viewport = new Rect(0, 0, bitmap.PixelWidth, bitmap.PixelHeight); //タイルサイズ指定方法は絶対値、これで引き伸ばされない imgBrush.ViewportUnits = BrushMappingMode.Absolute; return imgBrush; } //ファイルドロップ時 private void Window_Drop(object sender, DragEventArgs e) { if (e.Data.GetDataPresent(DataFormats.FileDrop) == false) return; //ファイルパス取得 var datas = (string[])e.Data.GetData(DataFormats.FileDrop); var paths = datas.ToList(); paths.Sort(); MyBitmapOrigin = MakeBitmapSourceGray8FromFile(paths[0]); MyImage.Source = MyBitmapOrigin; } //ボタンクリック private void MyButton1_Click(object sender, RoutedEventArgs e) { int yoko = (int)Math.Ceiling(MyBitmapOrigin.PixelWidth / 2.0); int tate = (int)Math.Ceiling(MyBitmapOrigin.PixelHeight / 2.0); MyImage.Source = BilinearBgra32縮小専用(MyBitmapOrigin, yoko, tate); } private void MyButton2_Click(object sender, RoutedEventArgs e) { int yoko = (int)Math.Ceiling(MyBitmapOrigin.PixelWidth / 3.0); int tate = (int)Math.Ceiling(MyBitmapOrigin.PixelHeight / 3.0); MyImage.Source = BilinearBgra32専用(MyBitmapOrigin, yoko, tate); } private void MyButton3_Click(object sender, RoutedEventArgs e) { MyImage.Source = BilinearBgra32専用(MyBitmapOrigin, MyBitmapOrigin.PixelWidth * 2, MyBitmapOrigin.PixelHeight * 2); } private void MyButton4_Click(object sender, RoutedEventArgs e) { MyImage.Source = BilinearBgra32専用(MyBitmapOrigin, MyBitmapOrigin.PixelWidth * 3, MyBitmapOrigin.PixelHeight * 3); } //画像をクリップボードにコピー private void MyButtonCopy_Click(object sender, RoutedEventArgs e) { ClipboardSetImageWithPng((BitmapSource)MyImage.Source); } //クリップボードから画像追加 private void MyButtonPaste_Click(object sender, RoutedEventArgs e) { BitmapSource bitmap = GetImageFromClipboardWithPNG(); if (bitmap != null) { MyBitmapOrigin = bitmap; MyImage.Source = bitmap; } } private void MyButton5_Click(object sender, RoutedEventArgs e) { int yoko = (int)Math.Ceiling(MyBitmapOrigin.PixelWidth / 5.0); int tate = (int)Math.Ceiling(MyBitmapOrigin.PixelHeight / 5.0); MyImage.Source = BilinearBgra32専用(MyBitmapOrigin, yoko, tate); } } }
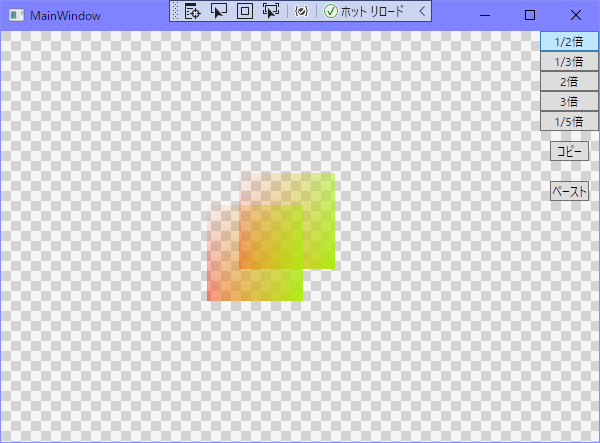
テストアプリで確認
確認用画像

プロパティをみると

テストアプリに表示してみると

縮小
1/2倍

1/3倍


拡大
2倍


3倍


こうして32bit画像の拡大縮小できるようになったわけだけど、ここまで来るまでには予想外の問題があった
32bitと24bitは違った
8bitグレースケールは輝度値が8bit(0~255)の表現
24bitはRGBがそれぞれ8bitで合計24bit
32bitはRGBに加えて透明度A(Alpha値)を加えたものでARGB各8bitで合計32bit、半透明が表現できる
昨日の8bitから24bitへの対応は簡単にできたから、今回の32bit対応も同じ感じだと思っていて普通に書いたら

画像単独で表示してみる

拡大してみると

色を確認してみる

隣の色はARGB=252,173,229,16
すべての値が隣の半分の数値になっている
変換前の元の画像の同じ場所の色を確認

緑色はARGB=254,164,231,16
つまり不自然な黒線は、縮小時の参照範囲が緑と透明にまたがった形になって、その中間の色になったってこと、なので黒線は透明ピクセルとの境目に発生している
中間の値にするっているのは、そういう処理を書いているから間違っていないんだけどねえ
透明ピクセルは透明なんだけど、透明度Aを除いたRGBの値は0,0,0だから、これは黒、真っ黒、これが縮小処理でAが0以上になると出てきてしまって不自然な黒に見えるってことみたい
透明度Alphaの値をすべて255にして不透明にすると

どうなればいいのかエクセルの図形に色塗って考えてみる


黄色ARGB=255,255,255,0と透明の中間の色は?
試しに中間だからすべての値を中間にすると、かなり不自然な色になるのがわかったので、この方法は間違っている
じゃあどんな色なら自然なのか
Alphaの値は今まで通り距離に応じた値に変化させていいはずとして、1.5倍時の中間なら128
それ以外のRGBは、完全透明のピクセルの値は無視して、それ以外のピクセルの色を引き継ぐ
右の図がそれで、ARGB=128,255,255,0
これが自然だと思う、これがいい
Alphaは今まで通りでいいとして、RGBだけ別の計算になる、その計算はどうするのか
一昨日の記事から


D区の面積率が0.4だった場合は、1.0からそれを引き算して
1.0 - 0.4 = 0.6
0.6を有効面積率として
この0.6を1.0に延ばすには
1.0を0.6で割り算
1.0 / 0.6 = 1.6666667
1.67倍すればいい
この倍率を、3区のRGBの各値*面積率の合計に掛け算して完成
図の場合のgreenを見ると、ABCDの値*面積率は
0, 127.5, 22.5, 0、合計で153、これが有効面積率の60%ぶんの値で、ここから100%にしたいから、1/0.6を掛け算して
153 * 1 / 0.6 = 255
これで完成
今思ったけど、これだと完全透明ピクセルが黒(0,0,0)前提で計算しているから、もし黒以外の完全透明だった場合は良くない結果になるなあ、でも完全透明ピクセルは多くの場合黒のはず
感想
32bit対応は思ってたより難しかった
これでバイリニア法での拡大縮小は完了
バイリニア法ってのは距離に直線的に比例して色を決めるらしいけど、実際にどう書いたらいいのかわからなくて試しているうちに面積にたどり着いた、面積も辺の長さが距離だから全く関係ないわけじゃないけど、やっぱり違うのかなあってのがある
それでも結果としては期待通り、想像通りの変換ができたのでかなり満足
3年前のもやもやを解消できたッ!
バイリニア法編完
関連記事
次回は6日後
gogowaten.hatenablog.com
前回は昨日
gogowaten.hatenablog.com
バイリニア法の再挑戦は一昨日から
gogowaten.hatenablog.com
画像処理の基本はグレースケールなんやねえ